Although “Alexbk66” made a plugin for Homeseer to read and control several Shelly Cloud devices, I’d like to have similar functionality via a script, for free. Therefor I made a script to integrate the Shelly Cloud Wall Plug-S into Homeseer.
Script version 1.0 at the bottom of the page, will show the most important data and values from the Shelly Plug-S devices in your network. For this a single line of code needs to be changed in the script file, with the IP address and name of each device. The name that is set in the Shelly Cloud app, is not available in the JSON output, so you have to define it yourself, more explaination later about this part.
Before I’ve bought these Shelly Cloud Plug-S devices, I need to be sure there is an option to control it from outside the Shelly Cloud app. There is an option to load the Tasmota firmware on it, but apparently it’s also possible in the Shell app, to not connect it to the cloud (default setting). My preference is still to not have a connection with a cloud or app supplier, so maybe later, I’ll flash Tasmota on it. In case you want to continue with Tasmota, take a look here: https://faulty.cloud/blog/shelly-plug-s-pinout
The original wallplug seems to be the Blitzwolf BW-SHP6, which can be bought very cheap in Asia.
First things first!!
First thing to do is to add the Plug-S device in the Shelly Cloud app, because it has to be included in the local wifi network:
- Install the Shelly Cloud app on a mobile device(Android/iOS).
- In the top right corner, click the ‘hamburger’ menu and choose for “Add Device”.
- Select your network (2.4 GHz)
- Enter your wifi password
- The app will search for nearby devices that are in include mode. In my case the Wallplug S devices, were not able to get in include mode direct from package, so I had to reset them first (press the B-button on the sode for 10 seconds untill the ledring is flashing red/blue).
In the end, the device is added to the app. Check via the control button, if you are able to control the relais to switch on or off a light. In the Homeseer script, no authentication is used, so no username and password should be set in the app.
- In the app, click on the device and go to “Settings” and “Device Information”, here you’ll find the Device IP (Address).
- Download the “Shelly_PlugS.vb” script at the bottom of the blogpost and save it in the Homeseer\Scripts folder. be aware the file extension is still “.vb”.
- Open “Shelly_PlugS.vb” script and scroll to line 14, here you have to change the IP address(es) and device name(s): Public Shared DevArray = “192.168.178.30|TV Light,192.168.178.31|Freezer”
The format of one value including double quotes = “<IP address>|<device name>”
In case you want to add more than one device, it needs to be followed by a comma (including double quotes): “<IP address>|<device name>,<IP address>|<device name>”
In above example, there are 2 device available, where device name has to be defined by yourself, because it’s not available from data output from the app.
1) IP address = 192.168.178.30 with device name “TV Light”
2) IP address = 192.168.178.31 with device name “Freezer”
- Save the script file.
- Open Homeseer and go to the Events in the Toolbar.
- Create a new event, that is (for example) triggered Manually.
- The action is to “Run or Run a Script Command”. With the Edit button you can select the “Shelly_PlugS.vb” file and Suubmit the popup.
- Run the event manually.
Homeseer devices
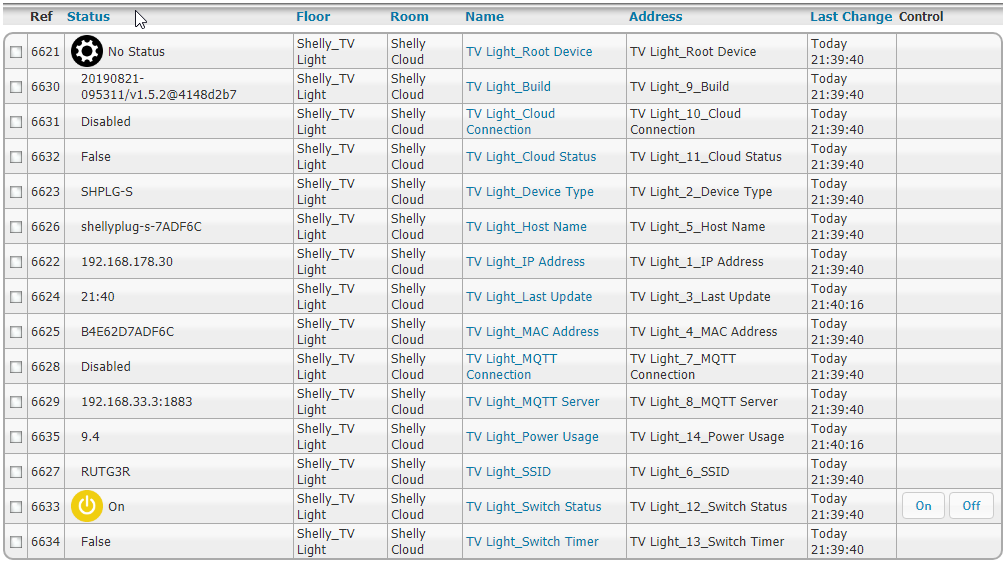
On the Homeseer Device Utility page, you’ll see that the script will create one Root and 14 Child devices.
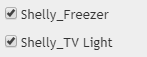
When you click on the “Floor” filter, in my case I see the two devices from the script example:
Script explanation
What the script is actually doing, is taking the IP address from the variable (line 14) and run the following http command: “http://<ip address>/settings”. The output is a JSON output, that can be read by the script.
In case you want to have a more readable view on the JSON output, load the url “http://<ip address>/settings” in your browser, copy the output and go to http://jsonviewer.stack.hu/ and paste the output in the “Text” tab. After this go to the “Viewer” tab, and when you collapse all results, it’s more cleared which data is available for the device.
Child device 12 will show the “Switch Status”, which is actually the state of the internal relais. The On and Off buttons will use the same “Shelly_PlugS.vb”script, but a different Sub, starting from line 276.
In other events in Homeseer, you can control this Switch state, via the “Control a Device” action.
Note: Because the data is not automatic polling from the device(s), you could change the Event from Manually trigger, to a recurring event, for example every minute. Besides switch the relais, only the Energy Usage will change.
Release notes:
| 30-09-2019 | v1.1 |
|
| 28-09-2019 | v1.0
Tested on HS3 3.0.0.548 with
|
|
Downloads:
 Shelly_PlugS.vb (13.0 KiB, 1,159 hits)